Although both the BFR and the future OO and HO gauge railways will be capable of operating analogue stock, I want to run them on DCC whenever possible due to the increased flexibility and functionality.
Consequently, I’m slowly working through my analogue stock and fitting it with decoders.
Those that are DCC-ready are usually nice and easy and just involve fitting the decoder in a socket, however, I have a number of models, often older ones, which have no socket and require hard-wiring.
Over the last couple of days I’ve attempted a few of these conversions.
First, I thought I’d have a go at fitting a DCC decoder to my 009 Minitrains ‘Gmeinder’ 4 wheel diesel shunter, following the comprehensive instructions on the Minitrains site. I opted for a Zimo MX616F, a tiny decoder that would easily fit inside the cab.
Sadly, this turned out to be a bit of a disaster.
I did mange to get the four decoder wires fitted to the pickups and motor, and got as far as successfully reading the decoder on the programming track.
However during testing on the ‘live’ track, the chip suddenly went dead and subsequently wouldn’t respond to any commands on either programming or main tracks. I suspect that a rogue bit of solder caused a short-circuit and has killed the chip.
I also realised that I’d managed to melt the lugs that hold the pickups to the chassis, stopping them from remaining in place and making the loco impossible to reassemble.
For now, I’ve decided to abandon the attempt and have acquired another loco to provide a donor chassis to try again at a later date.
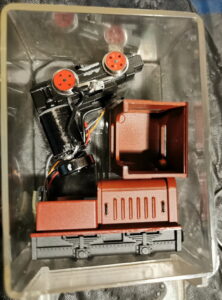
The parts of the Gmeinder diesel after a failed attempt at DCC fitting.

I then turned my attention to three of my Regional Railways liveried DMUs: A Lima 101, Lima 117, and a Hornby 155. I figured the extra space available inside these, and the simple wiring, would be a good option for improving my skills with an iron.
They are fitted with Zimo MX600Rs, quality decoders at a very reasonable price point!
All three required a little bit of cleaning and lubrication to get them running smoothly on DC before attempting the conversion, but once this was done, they all ran pretty smoothly given they had spent many years in storage.
The two Lima units were fairly similar. Both had the same type of motor and each bogie on the power car only picks up from one side.
This meant de-soldering the existing pickup and motor connections on the power bogie and soldering the appropriate wires from the decoder in their place. (red to the pickup, orange and grey to the motor)
The wire from the pickup on the rear bogie was then joined to the black pickup wire on the the decoder, and protected with some heat-shrink.
The decoder fitted nicely across the width of the body. Given the poor interior detail of these models, I wasn’t too worried about hiding the wiring.
I taped up the remaining decoder wires, rather than cutting them off, in case I decide to fit lighting later.
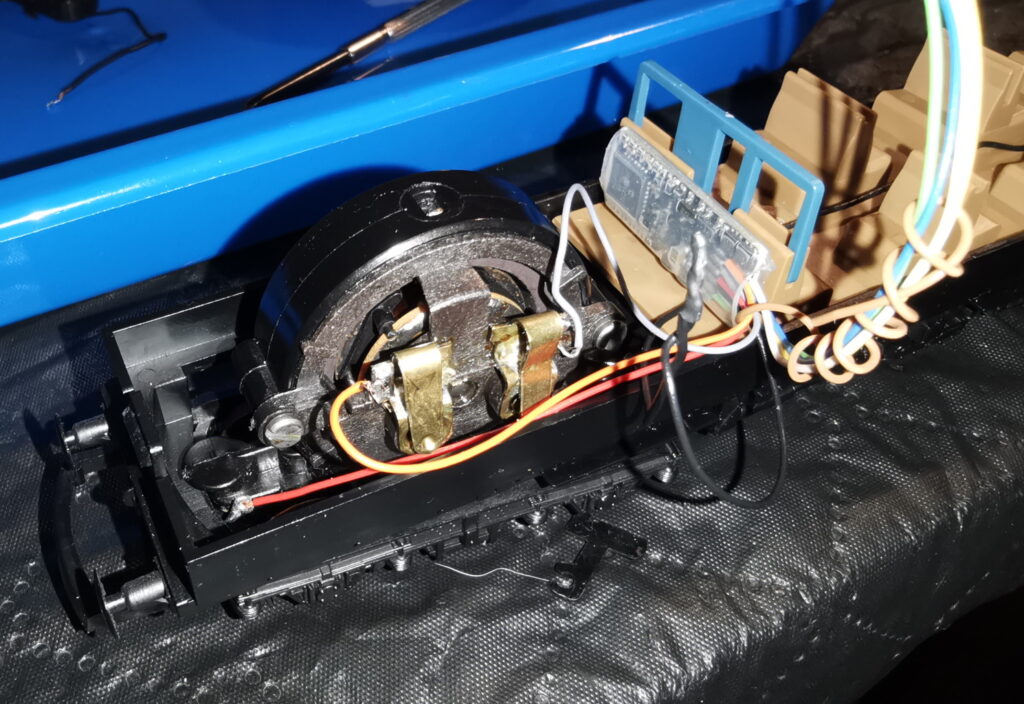
The decoder fitted into the Lima 117

The Hornby 155 was a slightly more complex installation, because it picks up from both sides of both bogies on the power car.
In this case, I desoldered the motor connections, and soldered the wire from the rear pickup to the corresponding brass pickup on the motor bogie.
Then, as before, I soldered the red and black decoder wires to the motor bogie pickups, and grey and orange wires to the motor.
After the wiring was finished on each one, I tested on first the programming and main tracks.
A bit of CV tweaking was required to get the acceleration, deceleration and top speed to suitable values, but by the end of the process, I had 3 working, DCC-fitted DMUs.
Overall, a mixed bag then, but I still consider it a 3-1 win.
Now I just need to decide on the next victim…
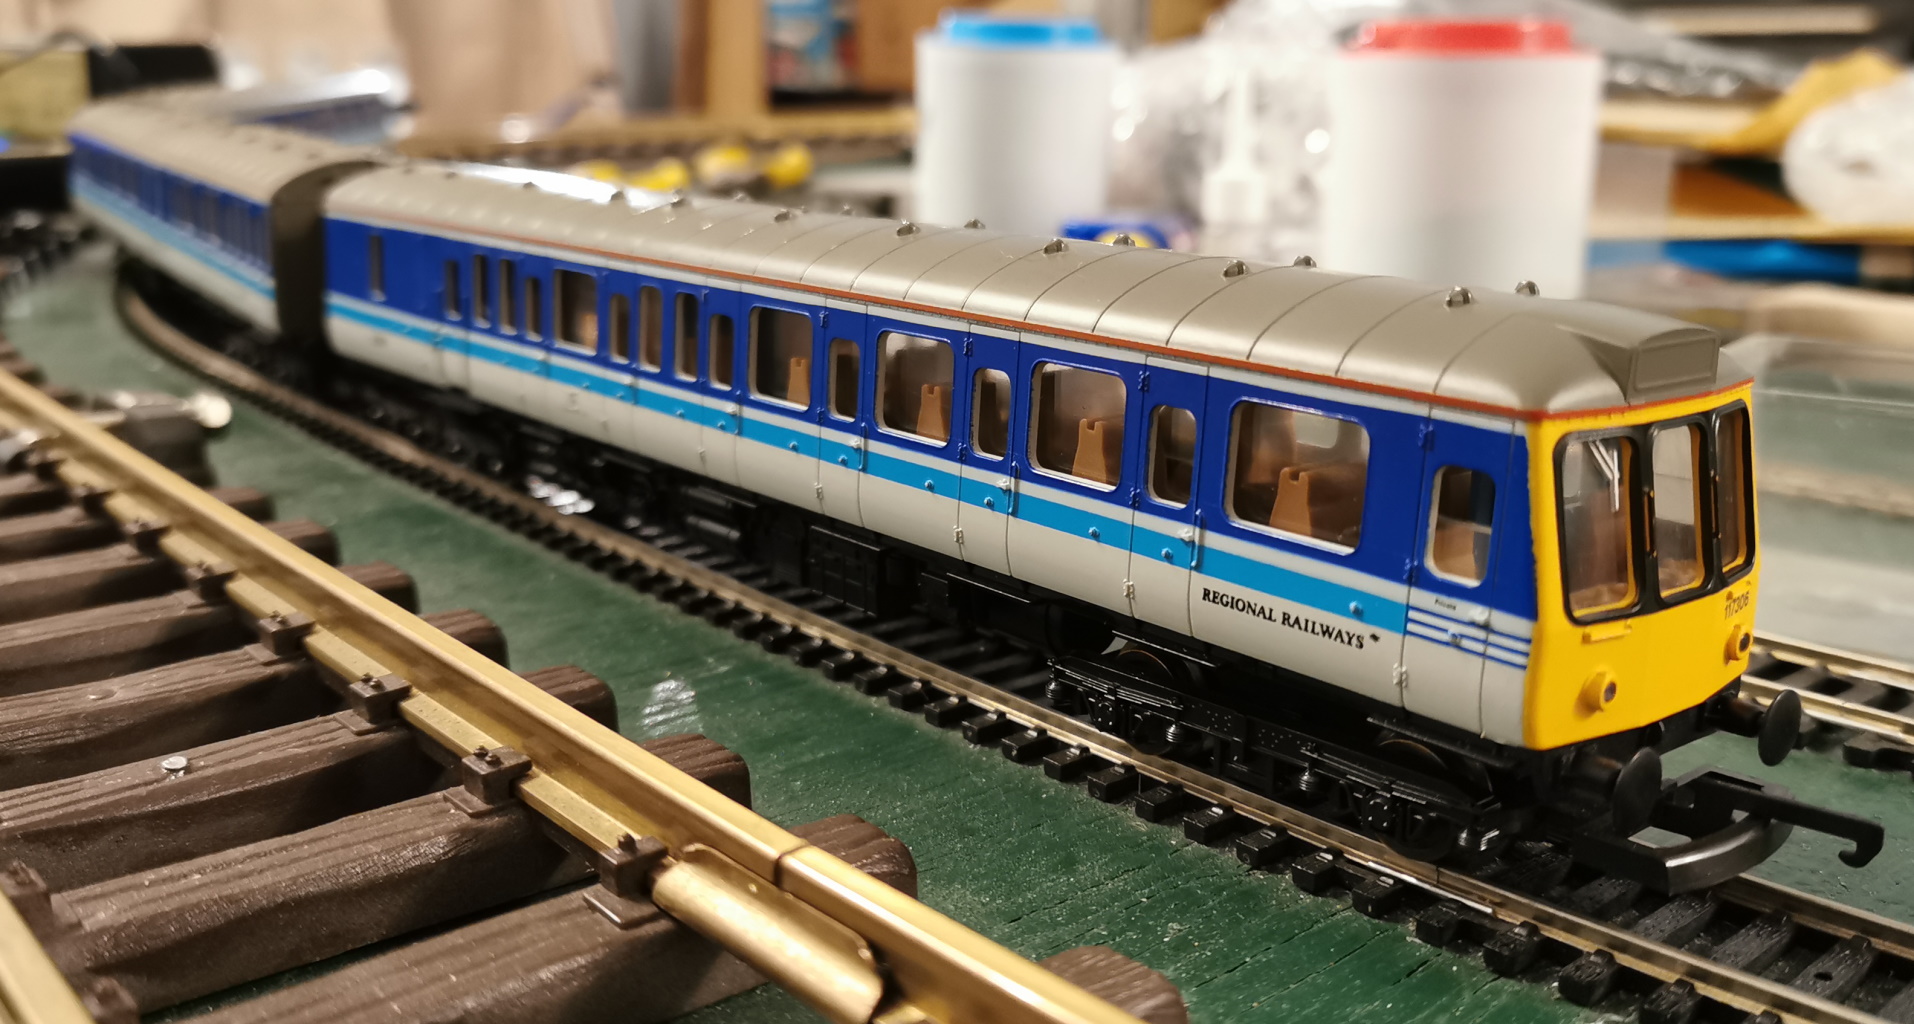
The Class 117 DMU on the test track after DCC fitting.